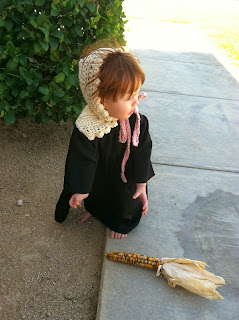
Size 12-18 months
Materials:
Worsted weight yarn
I/9-5.50MM hook
Ribbon if not making the drawstring out of yarn. (35-40 inches)
Darning needle
measuring tape
scissors
Bonnet:
Ch 61
Sc in 2nd ch from hook and back across.
*Ch2 turn, dc in front loops only across
Ch1 turn, sc in back loops only across*
Continue * to * until piece measures about 5.5 inches.
(If you want the bonnet to fit further forward on the head continue for a few more inches.)
(This is the ridge side.)
(This is the smooth side.)
Ch1 turn *sc,2 dc,sc in next stitch, sl st in next stitch*.
Repeat * to * across.
(This will create the decorative edge.)
Do not turn, Sc along side to create a more even edge.
Fold piece in half joining corners and sc the piece together.
Ch1 sc back across.
When you get to the end of that row continue your next sc to the edge of the other side that does not yet have an even edge.
Sc across to end.
Finish off.

Ribbon:
Ch 120
Sc back across.
Finish off.
(Ribbon)
(Weave ribbon through ridges.)


How adorable! And the hat is almost as cute as the model. :)
ReplyDeleteThank you! I have to agree with you on that! :p
DeleteHi Kayla, I love this vintage bonnet that you made and the pattern! So pretty and delicate. You did a great job making this. Thanks for your sweet comment on my mini pumpkins that I made. I hope you have fun making them.
ReplyDeleteJulie at julieslifestyle.blogspot.com